Snowflake is a well known cloud-based database.
It’s used for Data Warehouses and other big data applications.
In this article and the following ones I want to show how to setup and access
a snowflake database from various clients such as R, Tableau and PowerBI.
So let’s start using R.
Setup Snowflake
Assuming that we already have access to an instance of Snowflake we first setup
a new environment for our tests. This environment consists of a warehouse,
a database and an user.
Note: I will name all things we will create EXAMPLE_something. So we
can recognize our new items.
Create Warehouse
A warehouse represents the computing power. A warehouse has a specific size
which determines the computing power (and the price you pay for it). You only pay
for the time the warehouse is used.
So switch to SYSADMIN role and create a new warehouse. We call it EXAMPLE_WH.
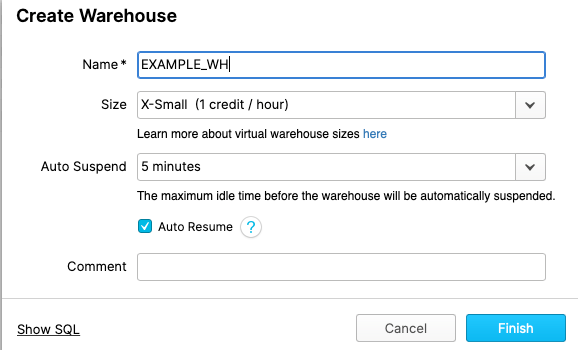
Don’t press Finish. Instead click onto Show SQL.
As you can see we can use SQL-commands (or SQL-like commands) to create this warehouse. Actually we’ll
do this.
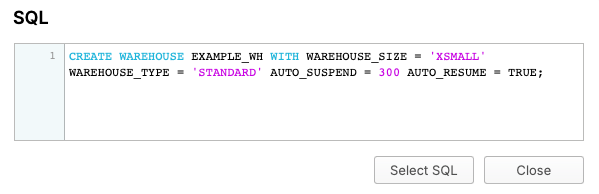
Copy this SQL-command and switch to Worksheets.
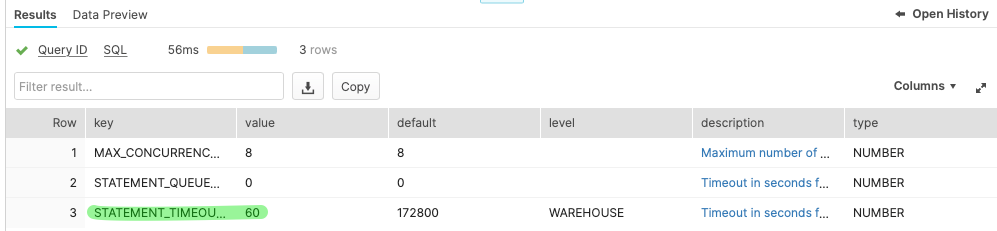
As you can see we choose a smaller timeout for AUTO_SUSPEND. We also lower the
value for STATEMENT_TIMEOUT_IN_SECONDS. That’s like a safety net in case something
runs amok.
1
2
3
4
5
|
CREATE WAREHOUSE EXAMPLE_WH WITH WAREHOUSE_SIZE = 'XSMALL' WAREHOUSE_TYPE = 'STANDARD' AUTO_SUSPEND = 60 AUTO_RESUME = TRUE;

alter warehouse "EXAMPLE_WH" set STATEMENT_TIMEOUT_IN_SECONDS = 60;

show parameters in warehouse "EXAMPLE_WH";
|
Create Database
Using the worksheet we can create a database, too. We call it EXAMPLE_DB.
1
|
CREATE DATABASE EXAMPLE_DB;
|
Create Role
We also create a role called EXAMPLE_ROLE. This role will be used to manage
permissions.
1
2
|
use role USERADMIN;
CREATE ROLE EXAMPLE_ROLE;
|
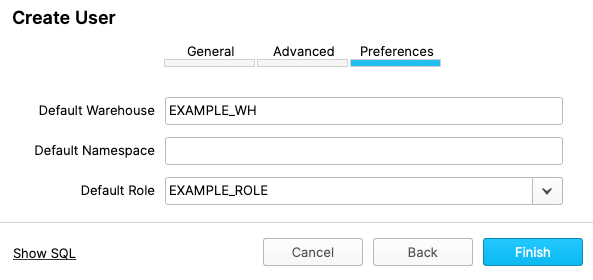
Create User
Now we can switch our own role to ACCOUNTADMIN and create a new user called
EXAMPLE_USER.
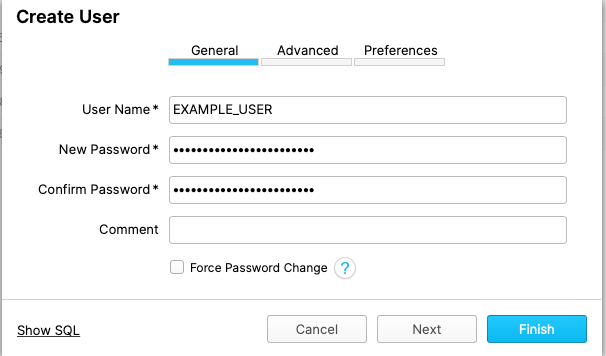
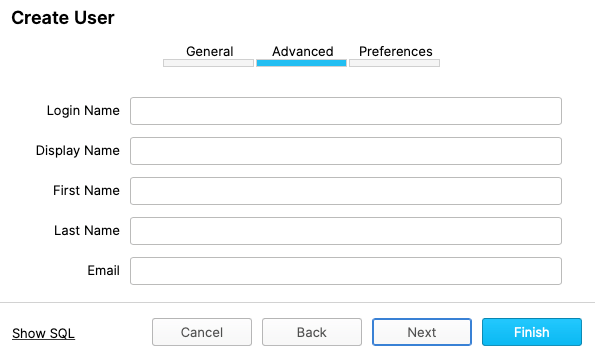
As you can see it’s also possible to create a user using SQL-commands.
1
2
|
CREATE USER EXAMPLE_USER PASSWORD = '****' DEFAULT_ROLE = "EXAMPLE_ROLE" DEFAULT_WAREHOUSE = 'EXAMPLE_WH' MUST_CHANGE_PASSWORD = FALSE;
GRANT ROLE "EXAMPLE_ROLE" TO USER EXAMPLE_USER;
|
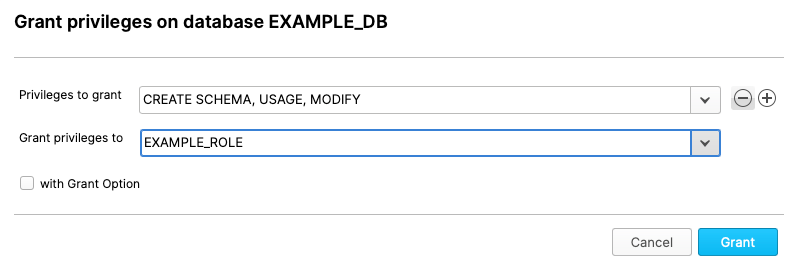
Grant permissions to Role
Now grant permissions for the database to our new role.
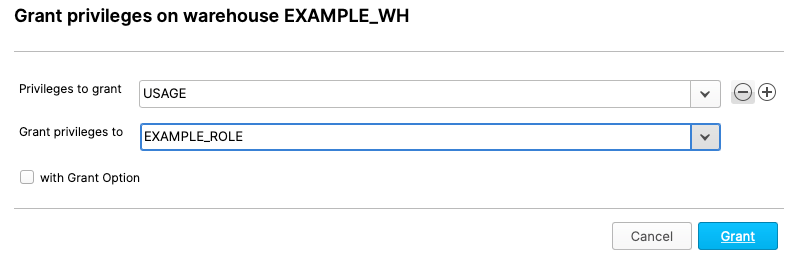
Also grant permissions for the warehouse to the role.
Create Schema
Now we should grant EXAMPLE_ROLE to SYSADMIN role because we can use our default
user and switch to EXAMPLE_ROLE and create a schema within the database.
The new schema is called EXAMPLE_SCHEMA.
1
2
3
|
use role EXAMPLE_ROLE;
use database EXAMPLE_DB;
CREATE SCHEMA "EXAMPLE_DB"."EXAMPLE_SCHEMA";
|
Create tables
Within the newly created schema we create two empty tables.
1
|
CREATE TABLE "EXAMPLE_DB"."EXAMPLE_SCHEMA"."TABLE_A" ("ID_1" INTEGER NOT NULL, "ID_2" STRING NOT NULL, "VALUE_1" STRING NOT NULL, "VALUE_2" INTEGER NOT NULL);
|
1
|
CREATE TABLE "EXAMPLE_DB"."EXAMPLE_SCHEMA"."TABLE_B" ("ID_1" INTEGER NOT NULL, "ID_2" STRING NOT NULL, "VALUE_1" STRING NOT NULL, "VALUE_2" INTEGER NOT NULL);
|
Accessing Snowflake from R
So now it’s time to connect to Snowflake from R:
Connection via DBI
You have to setup an odbc-connection to access Snowflake from R.
The way to do this depends on your operation system. So have a look at
the manual at Snowflake,
please.
 1
 2
 3
 4
 5
 6
 7
 8
 9
10
11
12
13
|
library(tidyverse)
library(dbplyr)
library(DBI)

db_connection <- DBI::dbConnect(odbc::odbc(),
                         Driver="Snowflake",
                         Server="MY_SNOWFLAKE_SERVER.snowflakecomputing.com",
                         Database="EXAMPLE_DB",
                         SCHEMA="EXAMPLE_SCHEMA",
                         UID="EXAMPLE_USER",
                         PWD="MY_SECRET_PASSWORD",
                         WAREHOUSE="EXAMPLE_WH"
)
|
Writing some data
Let’s generate some sample data and push it to Snowflake.
 1
 2
 3
 4
 5
 6
 7
 8
 9
10
11
12
13
14
15
16
17
18
19
20
|
n_rows <- 12
set.seed(0815)
data_a <- data.frame(
  ID_1 = 1:n_rows,
  ID_2 = c("a", "b", "c"),
  VALUE_1 = sample(c("Apple", "Pear", "Banana"), n_rows, replace = TRUE),
  VALUE_2 = round(runif(n_rows, max = 100))
)
copy_to(db_connection, data_a, "TABLE_A", overwrite = TRUE)

ids <- 12
n_rows <- ids * 10
set.seed(0815)
data_b <- data.frame(
  ID_1 = 1:ids,
  ID_2 = c("a", "b", "c"),
  VALUE_1 = sample(c("Jim", "Max", "Hanna", "Maria", "Lucy", "John"), n_rows, replace = TRUE),
  VALUE_2 = round(runif(n_rows, max = 100))
)
copy_to(db_connection, data_b, "TABLE_B", overwrite = TRUE)
|
As you can see we use copy_to() to push a data.frame into a Snowflake database.
That’s not the preferred way. For small data it’s acceptable and a fast way
to get some data to Snowflake.
Reading some data
Reading from Snowflake is as simple as working with data.frames. We just bind
a table to an R object using tbl().
1
2
3
|
a <- tbl(db_connection, "TABLE_A")
a %>%
  collect()
|
 1
 2
 3
 4
 5
 6
 7
 8
 9
10
11
12
13
14
15
|
# A tibble: 12 × 4
    ID_1 ID_2  VALUE_1 VALUE_2
   <dbl> <chr> <chr>     <dbl>
 1     1 a     Pear         64
 2    12 c     Pear         67
 3    11 b     Banana       91
 4    10 a     Banana        4
 5     9 c     Pear         65
 6     8 b     Pear         67
 7     7 a     Banana       20
 8     6 c     Pear         33
 9     5 b     Banana       32
10     4 a     Pear         33
11     3 c     Pear         43
12     2 b     Apple        91
|
Complex statements
Even complext statements you use within tidyverse are possible.
1
2
3
4
5
6
7
|
a %>%
  select(ID_1, ID_2, VALUE_1) %>%
  left_join(b, by = c("ID_1" = "ID_1", "ID_2" = "ID_2")) %>%
  group_by(ID_1, ID_2, VALUE_1.x, VALUE_1.y) %>%
  summarize(VALUE_2 = sum(VALUE_2)) %>%
  arrange(ID_1) %>%
  collect()
|
 1
 2
 3
 4
 5
 6
 7
 8
 9
10
11
12
13
|
# A tibble: 59 × 5
# Groups:   ID_1, ID_2, VALUE_1.x [12]
    ID_1 ID_2  VALUE_1.x VALUE_1.y VALUE_2
   <dbl> <chr> <chr>     <chr>       <dbl>
 1     1 a     Pear      John           58
 2     1 a     Pear      Hanna         174
 3     1 a     Pear      Jim            85
 4     1 a     Pear      Max            30
 5     1 a     Pear      Maria         171
 6     2 b     Apple     Hanna         261
 7     2 b     Apple     John          116
 8     2 b     Apple     Lucy          162
 9     2 b     Apple     Jim           170
|
The last command collect() fetches the data from the database. Until this
command nothing has happend.
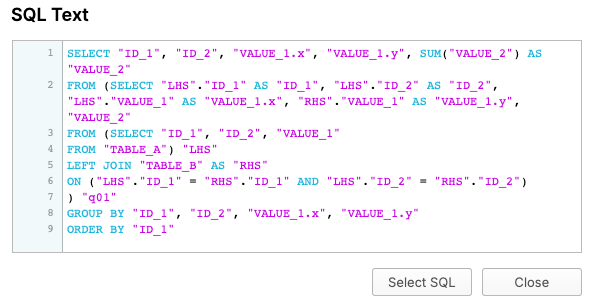
SQL
Before calling collect() we can inspect the SQL-code which will be send to
Snowflake.
Therefor you can call show_query().
1
2
3
4
5
6
7
8
|
query <- a %>%
  select(ID_1, ID_2, VALUE_1) %>%
  left_join(b, by = c("ID_1" = "ID_1", "ID_2" = "ID_2")) %>%
  group_by(ID_1, ID_2, VALUE_1.x, VALUE_1.y) %>%
  summarize(VALUE_2 = sum(VALUE_2)) %>%
  arrange(ID_1)

query %>% show_query()
|
 1
 2
 3
 4
 5
 6
 7
 8
 9
10
|
<SQL>
SELECT "ID_1", "ID_2", "VALUE_1.x", "VALUE_1.y", SUM("VALUE_2") AS "VALUE_2"
FROM (SELECT "LHS"."ID_1" AS "ID_1", "LHS"."ID_2" AS "ID_2", "LHS"."VALUE_1" AS "VALUE_1.x", "RHS"."VALUE_1" AS "VALUE_1.y", "VALUE_2"
FROM (SELECT "ID_1", "ID_2", "VALUE_1"
FROM "TABLE_A") "LHS"
LEFT JOIN "TABLE_B" AS "RHS"
ON ("LHS"."ID_1" = "RHS"."ID_1" AND "LHS"."ID_2" = "RHS"."ID_2")
) "q01"
GROUP BY "ID_1", "ID_2", "VALUE_1.x", "VALUE_1.y"
ORDER BY "ID_1"
|
Here’s the SQL-command which Snowflake shows in its history: It’s identical.
Next Articles
The next articles will show how to access this data from Tableau and PowerBI.